Commercial and Industrial Lighting continues to see a major shift with the ongoing mass adoption of LED lighting technology. One of the most popular lighting products out there are LED Pot Lights. They are energy-efficient, offer a sleek design, and provide excellent illumination. In this article, we’ill walk you through the installation process of LED pot lights.
First, let's address a common question, "Can I install pot lights myself?" The answer is yes, but it requires some basic knowledge of wiring and safety precautions. If you're not comfortable handling electrical components, it's always better to hire a professional.
A Look at LED Pot Lights
LED Pot Lights have become increasingly popular due to their versatility and the ability to offer concentrated lighting. They are available in different designs and sizes, so whether you're looking for Office Lighting or want to brighten up your Kitchen, LED Pot Lights could be the ideal choice.
They are also referred to as LED Downlights due to the downward illumination they provide. LED Downlights are perfect for creating focused lighting in a particular area, making them suitable for task-oriented places like office spaces or lounges.
"LED Pot Lights are not only aesthetically pleasing but also highly functional, making them a preferred choice for various commercial and industrial applications."
Preparing for Installation
Before installing your LED Pot Lights, there are a few things you should consider:
Number of lights: It's crucial to know how many LED Pot Lights can be on one circuit. An overload can cause circuit breakers to trip. As a rough guide, a 15-amp circuit can support about 1400 watts and a 20-amp circuit about 1900 watts. Considering that most LED Pot Lights use between 10 and 20 watts, you can install a considerable number on a single circuit. Keep in mind, it’s always recommended to only use 80% of a circuit’s capacity.
Need for a junction box: The question, "Do LED Pot Lights need a junction box?" often arises. Most LED Pot Lights now come with an integrated junction box, eliminating the need for a separate one. However, it's essential to verify this with your specific model.
Connecting the lights: How do you connect LED Pot Lights together? This can typically be done using wiring connectors, also known as pigtails. They allow you to connect multiple lights together safely. However, always refer to the manufacturer's instructions to ensure proper installation.
Understanding the wiring: The wiring required for LED lights usually involves a live wire, a neutral wire, and a ground wire. The live wire carries the electrical current, the neutral wire provides a pathway for the current to return, and the ground wire is a safety feature to prevent electrical shocks.
We have covered the initial steps in preparing for the installation of LED Pot Lights. The process might seem overwhelming, but don't worry! We're here to guide you through every step.
In the next section we’ll take a further look into the installation process for different types of ceilings and special considerations for locations like your bathroom and shower. If you need more insight into LED lighting, don't forget to visit our LED Network Blog. We will be discussing more about dimmable LED Pot Lights and how they can make a difference in your lighting installation.
In the meantime, feel free to explore our wide range of collections for all your LED lighting needs.
How to Install LED Pot Lights in Different Ceilings
Now that you have a grasp on the basics of LED Pot Lights, let's dive into the installation process. Whether you're looking to brighten up a room with Recessed LED Lighting or install LED Ceiling Lights, we have you covered.
Drywall Ceiling
Drywall ceilings are common in most homes and offices. Here's how you can install LED Pot Lights in a drywall ceiling:
- First, turn off the electricity in the area you will be working on.
- Use a stud finder to avoid drilling into any studs.
- Outline the area where you want to install the light using the template provided with your LED Pot Light.
- Cut out the marked area with a drywall saw or appropriately sized hole saw.
- Run the appropriate wiring to the cutout.
- Connect the wiring to the LED Pot Lights as per the manufacturer's instructions.
- Finally, insert the pot light into the cutout and secure it according to the manufacturer's directions.
Drop Ceiling
Drop ceilings are common in commercial settings. Here's how you install LED Pot Lights in a drop ceiling:
- Start by turning off the power in the area you're working on.
- Identify and mark the area where you want to install the light.
- Use a template to draw an outline on the ceiling tile.
- Carefully cut out the marked area using a utility knife.
- Run the necessary wiring to the cutout.
- Connect the wiring to the LED Pot Light as per the manufacturer's instructions.
- Finally, insert the Pot Light into the cutout and secure it. The weight should be supported by the grid structure of the drop ceiling.
Soffit
A soffit is an exterior or interior architectural feature, usually the underside of any construction element. The steps for installing LED Pot Lights in a soffit are similar to those for a drywall ceiling, with the additional step of ensuring you have outdoor-rated fixtures if the soffit is exterior. We also recommend Wet Rated Pot Lights for exterior installations.
"Regardless of the type of ceiling, safety should always be your priority. If you're not comfortable performing these tasks yourself, don't hesitate to hire a professional."
Controlling Your Lights
Most LED Downlights do not require a special switch; they can be controlled with a regular on-off switch. However, if you're planning to use Dimmable LED Pot Lights, you might need to install a LED-compatible dimmer switch.
In our comprehensive guide on LED dimming options, you can learn about the different types of dimmers available and how to choose the right one for your Recessed LED Lights.
Remember, using the wrong dimmer with LED lights can cause flickering, reduce the lifespan of your lights, and even lead to complete failure.
We've just covered how to install LED Pot Lights in various ceilings and the controls required to dim the lights. In the final section, we will look at how to safely install LED Pot Lights in your shower and provide insights on fire-rated pot lights for improved safety in your premises.
Don't forget to browse through our various collections like Bathroom Lighting to choose the right LED lights for your needs. Our LED Network Blog also provides an array of information for all your LED lighting queries.
Safe Installation of LED Pot Lights in Specific Areas
Understanding how to safely install LED Pot Lights in certain areas, such as your shower, is crucial for both safety and functionality. Let's examine how this can be done, keeping in mind the unique characteristics of these specific settings.
Installing LED Pot Lights in Your Shower
When installing LED pot lights in your shower, you need to keep safety and functionality in mind. The Pot Lights must be rated for wet environments. You can explore a range of suitable options in our Bathroom Lighting collection and our Wet Rated Pot Lights collection.
Here are some steps to follow:
- Start by turning off the power in the area where you're working.
- Choose an appropriate spot for the light fixture. It should not be directly over the showerhead, but it should still illuminate the shower well.
- Use a template to outline where you will cut into the ceiling.
- Cut the hole for the pot light.
- Run the necessary wiring to the hole.
- Connect the wiring to the LED Pot Light according to the manufacturer's instructions.
- Finally, insert the pot light into the hole and secure it.
"As a rule of thumb, always ensure that the LED Pot Lights you install in your shower are rated for wet locations to prevent any electrical mishaps."
Fire-Rated LED Pot Lights
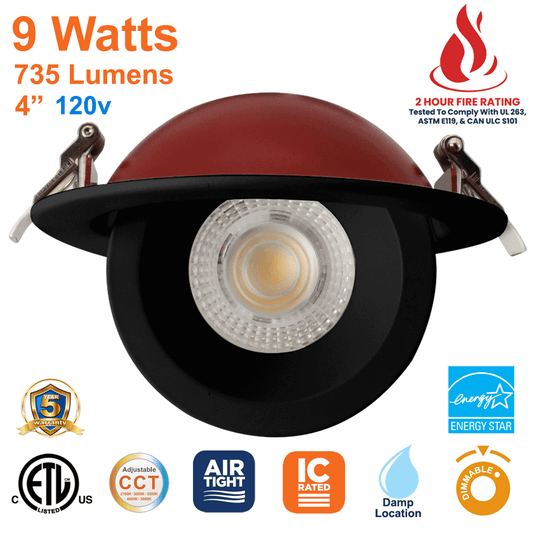
Fire-rated LED Pot Lights are designed to maintain the fire resistance integrity of a ceiling in the event of a fire. They automatically expand when exposed to heat, sealing off the Pot Lights and preventing the fire from spreading.
If you're replacing an old light fixture with a pot light in a ceiling that separates levels of your home, you might need to install fire-rated pot lights. For a more in-depth look into these, check out our Ultimate Guide to Fire-Rated Pot Lights.
Conclusion
Now that we've covered everything you need to know about installing LED Pot Lights, you can confidently embark on your next lighting project. Whether it's installing LED Downlights in a drywall ceiling, a drop ceiling, a soffit, or your shower, you're now equipped with the necessary knowledge.
As always, ensure you are adhering to all safety protocols, and don't hesitate to reach out to a professional if you're unsure about any aspect of the installation process. At LED Network, we offer a wide range of LED lighting solutions suitable for a variety of applications. Check out our LED Downlights and Office Lighting collections to see what might work best for your space.
Remember, the right lighting can dramatically enhance your space's aesthetic and functionality. Enjoy the process, and let your creativity shine!
"Lighting is an easy way to make a big difference in your home or office. With LED Pot Lights, you can create a modern and stylish space, while also enjoying the benefits of energy-efficient lighting."


