Retrofitting fire rated pot lights without attic access might sound like a daunting task, but it's absolutely achievable—even for seasoned DIYers. In this guide, you'll learn how to plan your lighting layout, understand IC-rated and airtight housings, navigate around obstacles like joists and insulation, and safely install recessed lighting using the right tools and techniques. We’ll walk you through selecting the best LED lighting for the job, managing electrical wiring, and ensuring wiring safety through every step of the process.
You’ll discover:
-
How to install recessed lighting in rooms with finished ceilings
-
Why IC-rated and fire-rated pot lights matter for safety and compliance
-
The tools you’ll need (like stud finders, junction boxes, and drywall cutting tools)
-
How to connect your lights without disturbing thermal insulation
-
Tips for choosing the right remodel housing for no-attic-access installs
By the end of this article, you'll know how to make a fire-safe, modern lighting upgrade in your home or business, even when attic access is out of the question.
Introduction: No Attic? No Problem.
When you're dealing with a finished ceiling or living on the ground floor of a multi-story home, traditional overhead access for lighting installation becomes a non-option. That’s where remodel housing and fire rated recessed lighting come in. With smart planning and the right tools, you can upgrade your lighting safely and efficiently—no attic access required.
Fire rated pot lights are designed to resist heat transfer and slow the spread of flames through ceilings. They are a critical addition to multi-unit dwellings, commercial properties, and increasingly, to modern homes focused on safety and efficiency.
Step 1: Planning Your Layout (Before You Cut)
Before a saw ever touches drywall, you’ll need a precise layout of your new lighting system. This is not the time to “eyeball” it—lighting placement affects not just aesthetics, but safety and functionality.
Your Pre-Installation Checklist:
-
Determine room dimensions and lighting goals
-
Use a stud finder to locate joists and obstructions
-
Sketch out spacing to avoid uneven illumination
-
Identify safe zones for electrical wiring and junction box placements
Pro Tip: A common mistake in DIY installation is cutting into ductwork or plumbing. Avoid this by measuring twice and using inspection cameras or coat hangers to check joist bays before making cuts.
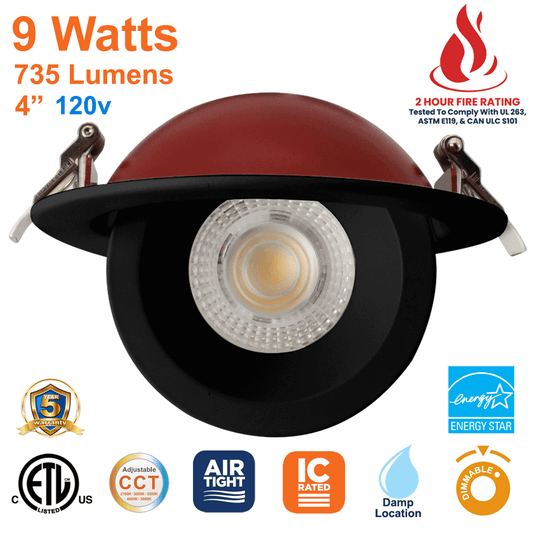
For projects that require fire-rated pot lights, consider our 4-inch Fire Rated Pot Light (IC Rated) — ideal for kitchens, hallways, and other high-use spaces where safety is non-negotiable.
Step 2: Selecting the Right Fire Rated Recessed Lighting
Fire rated recessed lighting isn’t just about code compliance—it’s about peace of mind. Look for features such as:
-
2-hour fire resistance rating
-
IC rating for safe contact with insulation
-
Wet location rating for use in bathrooms or covered outdoor spaces
-
CCT Selectable for custom color temperatures
-
Dimmable LED compatibility to control ambience
Our Fire Rated Pot Light Collection features multiple sizes and wattages suitable for both residential and commercial projects. Each fixture is engineered for no-attic-access installs, with low-profile designs and airtight housings to reduce heat loss and energy waste.
For smaller spaces or spotlighting, the 3-inch Fire Rated Pot Light offers sleek aesthetics without compromising performance.
Step 3: Cutting the Ceiling (With Confidence)
Once your layout is confirmed, it’s time to begin drywall cutting. Here’s how to do it cleanly and precisely:
-
Mark the cutout area using the paper template included with your light fixture
-
Use a drywall saw or hole saw for circular openings
-
Cut slowly to avoid damaging surrounding materials
-
Ensure the hole is clear of insulation or wiring before proceeding
If you're working in ceilings with thermal insulation, ensure you’re installing lights with IC-rated housings. These fixtures are built to prevent overheating and are compliant with most building codes when surrounded by insulation.
Our 6-inch Fire Rated Pot Light is ideal for larger rooms or commercial settings, offering high lumen output and safety certifications like cETL for Canadian installations.
“IC-Rated fire rated pot lights are designed to safely sit within insulated ceilings, minimizing fire risk while maximizing energy efficiency.”
Step 4: Choosing the Right Remodel Housing
When there's no attic access, your best friend is a remodel housing pot light. Unlike new construction housings, which require access to ceiling joists from above, remodel housings are designed to be installed from below the ceiling, through a pre-cut hole. That makes them ideal for finished spaces.
Here’s what you should be looking for in a fire-rated remodel housing:
-
Slim design to fit within tight ceiling cavities
-
Built-in junction box to handle wiring internally
-
Spring-loaded clips for easy securement to drywall
-
Airtight housing to improve energy efficiency and reduce heat transfer
-
IC-rated designation, meaning safe for direct contact with insulation
At LED Network, our pot lights are engineered specifically for these scenarios. Take, for example, the ultra-slim 4-inch IC-rated fire rated pot light—a compact but powerful option that works flawlessly in shallow ceilings with no overhead access.
Step 5: Making Sense of Wiring Without Attic Access
You’ve got your lights. You’ve got your layout. Now it’s time to talk electrical wiring.
Without attic access, routing wires between light fixtures and switches becomes a bit more surgical—but not impossible. Here’s how you approach it:
Two Common Wiring Methods:
A. Switch-Controlled Power Outlet
If you're installing a single light or a small group, the most efficient option is to use power from an existing outlet or switch circuit. Simply:
-
Cut a small hole near the switch box
-
Use fish tape to run cable inside the wall
-
Drill a hole through the top plate of the wall to reach the ceiling cavity
-
Pull wire through to each light location
B. Junction Box to Junction Box
For more complex layouts (like multiple lights in a line), create a “daisy chain” by connecting each light’s junction box to the next. This requires careful measuring and drilling through joist bays—so precision is critical.
Whichever method you choose, remember: all connections must be made inside a certified electrical box, and all cable paths should meet local code.
Safety Reminder: Shut off your circuit breaker and confirm power is off using a voltage tester before beginning any wiring work.
If you're looking for a streamlined wiring experience, the 3-inch fire-rated pot light from LED Network comes with integrated junction boxes that make direct connections easier and more secure—especially in tight spaces.
Step 6: Managing Insulation and Fire Safety
When installing recessed lights in insulated ceilings, choosing IC-rated fixtures is non-negotiable. These lights are specifically built to handle direct contact with insulation materials like fiberglass or cellulose without overheating.
Why IC-Rated Matters:
-
Prevents heat buildup in confined ceiling spaces
-
Avoids fire hazards due to insulation contact
-
Complies with building codes in most residential areas
-
Improves thermal performance by allowing uninterrupted insulation coverage
If your ceiling has thermal insulation installed, ensure there’s no gap between the insulation and the light fixture—as long as your light is IC-rated. This helps preserve the thermal envelope of your home, reducing energy loss.
Need something with a higher lumen output for larger rooms? Try the 6-inch fire-rated pot light—it's bright, IC-rated, and fully compatible with insulated ceilings.
"The key to a successful installation isn’t just light placement—it's maintaining the ceiling's insulation integrity while upgrading to safer, modern fixtures."
Step 7: Mounting Your Pot Lights Securely
With your layout complete and wires routed, it's time to mount the pot lights into the ceiling. Since you’re working without attic access, you'll be relying on the remodel housing’s spring-loaded clips—a clever mechanism that allows secure attachment from below the drywall.
How to Mount Remodel Pot Lights:
-
Compress the spring clips on both sides of the fixture.
-
Insert the fixture into the ceiling hole, guiding the wiring into the junction box.
-
Release the clips once the fixture is fully inserted—the tension will hold it tight to the drywall.
-
Gently push the housing up so it sits flush with the ceiling surface.
Most LED Network recessed lights are designed to fit ceilings as thin as 1/2 inch or as thick as 1-1/4 inches. This makes them a great option for retrofits in older homes, drywall drop ceilings, or even soundproofed ceilings.
If you're retrofitting into a high-moisture area—like bathrooms or covered patios—confirm your chosen model is wet-rated and includes a gasket seal to protect against humidity. This feature comes standard in our fire-rated pot light lineup, adding an extra layer of safety and durability.
Step 8: Electrical Connections & Wiring Safety
Once the fixture is in place, it's time to connect the wiring.
Before you begin: Confirm again that your circuit breaker is off and that there's no live voltage using a contactless tester.
Connection Steps:
-
Open the built-in junction box (usually mounted on the fixture housing).
-
Insert the NM cable through the knock-out hole, using a strain relief connector to secure it.
-
Connect wires: black (hot) to black, white (neutral) to white, ground to ground. Use approved wire nuts.
-
Tuck the wires neatly into the box and snap the cover back on.
This simple, secure connection system is one of the reasons our fire-rated models are preferred by both electricians and DIYers. Each junction box is certified and labeled, so you’re not guessing whether your install is up to code.
For any installation involving more than two light fixtures, we recommend using a licensed electrician to confirm amperage loads and box fill limits.
Step 9: Sealing and Finishing the Ceiling
You’re almost there.
For homes with airtight and energy-efficient ceilings, it’s important to ensure that any gaps around your lights are properly sealed. Even the smallest gap can allow warm air to escape into the ceiling cavity, creating condensation and energy loss.
Airtight Finishing Tips:
-
Use acoustic sealant or low-expansion spray foam around the edges of the fixture (from the ceiling side).
-
Do not overfill or cover any air vents or breathing holes on the fixture itself.
-
Replace any thermal insulation around the fixture if it was temporarily removed.
Sealing your installation preserves the fire resistance of your ceiling assembly and prevents the creation of heat tunnels that can lead to long-term structural issues.
Step 10: Power On and Test
Once everything is secured:
-
Flip the circuit breaker back on.
-
Test each switch or dimmer associated with your lighting.
-
Confirm:
-
Lights power on smoothly
-
No flickering or buzzing occurs
-
Dimming works across all selected color temperatures
-
Heat dissipation is even and minimal
-
Our CCT Selectable LED pot lights allow you to fine-tune the color temperature using a small switch inside the junction box. You can set your fixture to 2700K (warm white), 3000K, 3500K, 4000K (neutral), or 5000K (daylight) based on your room’s needs.
Final Thoughts: Safety, Style & Long-Term Performance
You’ve just retrofitted your ceiling with modern, fire-safe lighting—without touching the attic. That’s no small feat.
Installing fire-rated recessed lighting with no attic access requires thoughtful planning and the right products. From remodel housings and IC-rated fixtures to careful electrical wiring and air sealing, you’ve upgraded your space for both safety and efficiency.
Whether you're updating a condo unit, finishing a basement, or upgrading an older home, the right lighting doesn’t just brighten a space—it protects it.
Quick Recap of Recommended Fixtures:
-
4-inch Fire Rated Pot Light – 800 Lumens
Versatile, energy-efficient, and ideal for kitchens, hallways, and utility rooms. -
3-inch Fire Rated Pot Light – 655 Lumens
Perfect for small or tight ceiling spaces where minimal trim is desired. -
6-inch Fire Rated Pot Light – 1100 Lumens
Best for larger rooms, commercial applications, or general lighting with powerful coverage.
Need Expert Help?
Still unsure about which pot light fits your project best? Visit the LED Network homepage or contact our expert team—we’re Canadian-owned, and we know what local builders, homeowners, and contractors need for safe, compliant, and modern lighting.
Let us help you take the guesswork out of retrofit installs—no attic access required.
FAQ: Retrofitting Fire Rated Pot Lights with No Attic Access
1. Can I install fire-rated pot lights in a concrete ceiling?
Yes, but the process is different. You'll need to use surface-mounted housings or create ceiling cavities using drop ceilings or bulkheads. Core drilling may be necessary, and fire-rated fixtures should still be used if the space above the ceiling is fire-separated.
2. Are all IC-rated pot lights also fire-rated?
No. IC-rated lights are safe for contact with insulation, but they are not necessarily fire-rated. A fire-rated pot light has been tested to contain fire for a specific duration (e.g., 2 hours), whereas IC-rated refers to insulation safety. For compliance, ensure your fixture is certified for both IC and fire-rated use if your ceiling assembly requires it.
3. Do I need a vapor barrier over the pot lights if there’s no attic?
If your ceiling is part of the building’s air or vapor barrier system (common in ceilings below attics or roofs), you'll need to maintain the barrier’s continuity. Use airtight-rated fixtures and seal around them with acoustic caulk or vapor-barrier-safe gaskets.
4. How do I meet code if I can’t access the joists to attach junction boxes?
You’ll need to use fixtures with integrated, accessible junction boxes—which most remodel fire-rated pot lights now include. These are approved for use without external mounting and meet code when properly sealed and connected from below.
5. What size hole should I cut for my fire-rated pot light?
This depends on the trim size of your fixture. A standard 4-inch pot light might need a 4.25"–4.375" cutout, but always use the manufacturer’s template. Cutting the hole too large can reduce the integrity of the ceiling’s fire resistance.
6. Can I use a smart dimmer with fire-rated pot lights?
Yes, but ensure that:
-
The pot light is dimmable
-
The smart dimmer is compatible with LED loads
-
You stay within the wattage limits of the dimmer
Using a mismatched dimmer can lead to flickering or buzzing. Check for compatibility with low-wattage LED loads, especially if using just a few lights on the circuit.
7. What if I hit a joist when cutting the hole?
If your planned fixture location intersects a joist:
-
Shift the fixture by a few inches and mark a new location.
-
Patch the old hole using a drywall repair kit.
-
Always double-check joist positions with a stud finder before cutting.
8. Are fire-rated pot lights heavier than regular ones?
Slightly. The additional materials used to resist fire (like intumescent seals and heavier housings) can add weight. However, remodel clips are designed to handle it, and no additional bracing is typically needed for ceiling drywall installs.
9. Can I daisy-chain fire-rated pot lights without violating code?
Yes, provided:
-
The total wattage does not exceed the circuit's limit
-
Each fixture’s junction box allows for pass-through wiring
-
You maintain box fill limits (check the cubic inch rating)
Make sure to label your wiring and connections clearly for future servicing.
10. How do I ensure I’m meeting Canadian building code?
-
Use CSA/ETL/cETL-certified fire-rated fixtures
-
Follow CEC (Canadian Electrical Code) guidelines for wiring
-
Ensure your lights meet the required ULC-S101 or UL263 fire resistance standards
-
Hire a licensed electrician for verification or inspection if you’re unsure
LED Network only offers products compliant with Canadian safety and building codes, so shopping locally helps ensure your installation passes inspection.