Installing recessed lighting in insulated ceilings demands more than just a hole saw and ambition—it’s a precise balance of fire safety, thermal performance, and building code compliance. In this guide, we walk you through everything you need to know, from planning your lighting layout, selecting IC-rated fire-rated downlights, to cutting, wiring, and testing the installation. We cover essential tools, insulation strategies, and fire-protection requirements including intumescent hoods, airtightness, and thermal efficiency concerns. By the end, you’ll be able to confidently choose the right products and perform a professional-level installation—or know exactly what to expect from your installer.
Planning the Installation: Safety Before Style
Before jumping into sawdust and wiring, every downlight installation project should begin with a plan. Sketching a lighting layout not only ensures consistent illumination but helps avoid common hazards like cutting into joists, wires, or pipes.
Key Considerations When Planning
-
Ceiling structure: Locate ceiling joists and ductwork.
-
Lighting zones: Identify wet zones (like bathrooms) which require wet-rated and IC-rated fixtures.
-
Cut-out diameter & spacing: Use manufacturer specs for optimal light spread and safety.
-
Building Regulations: Consult your local requirements such as Part B (fire safety) and Part L (energy conservation) for residential installations.
One of the most overlooked steps is ensuring your selected pot lights are suitable for the ceiling environment. For insulated ceilings, choose only IC-rated fire-rated downlights, which are specifically designed to be covered with insulation safely. The fire-rated pot lights collection at LED Network offers several options compliant with BS 7671 Wiring Regulations and UL263 standards.
Pro Tip: Fire-rated fixtures should be tested for at least 30 to 120 minutes of fire resistance, depending on your local code and structure type.
Tools & Materials You’ll Need
Let’s talk about the toolbox. These aren’t just suggestions—they’re essentials.
Essential Tools
-
Hole saw (match to the fixture’s cut-out diameter)
-
Voltage tester
-
Wire strippers
-
Screwdrivers
-
Spirit level
-
Ladder or step stool
-
Safety goggles and gloves
Materials
-
IC-rated fire-rated pot lights
-
Fire-rated sealant
-
Cable clips
-
Junction boxes
-
Fireproof downlight covers or Loft Lid alternatives
-
Heat-resistant wiring
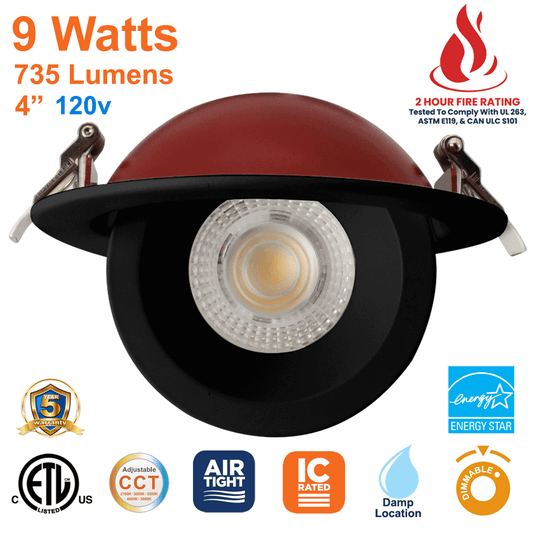
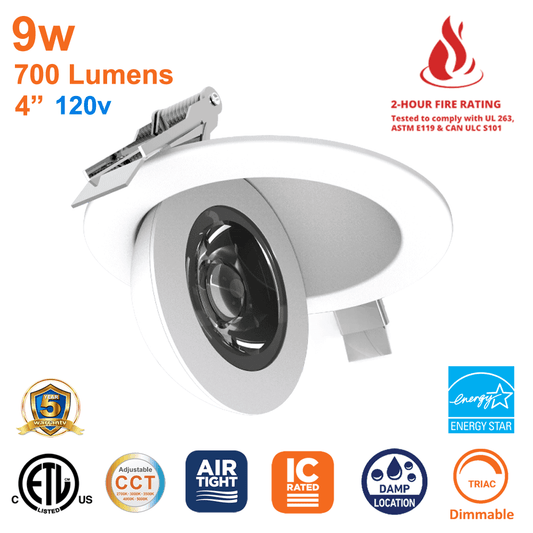
For instance, the 4-inch fire-rated LED pot light from LED Network provides 5 CCTs, is IC-rated, dimmable, and wet-rated—ideal for kitchens and bathrooms where moisture and insulation often overlap.
Step 1: Power Off & Safety Check
It’s tempting to start cutting holes, but fire protection and electrical safety start with one switch—the breaker. Cut the power at the panel, and test all wires with a voltage tester before handling.
Ensure that the area above the ceiling is free of debris or old electrical remnants. In older homes, improper DIY wiring or non-fire-rated downlights may already be in place. Identify any dichroic bulbs (commonly used in halogen systems)—these must be replaced, as they are not safe for insulated ceiling use.
Step 2: Mark & Cut the Ceiling Holes
With your layout finalized and wires safe, it’s time to make your move. Mark hole positions with a pencil, confirming that the spacing avoids joists and that your layout doesn’t compromise thermal bridging.
Cutting Tips:
-
Use a hole saw matched to the product’s cut-out diameter.
-
Cut slowly to prevent tearing or creating uneven edges.
-
Keep a vacuum nearby—airborne insulation fibers are not great for lungs or lenses.
If you're planning on installing a 3-inch fire-rated pot light, remember that smaller fixtures often require tighter tolerance cuts. Measure twice—cut once.
Step 3: Run Electrical Wiring and Install Junction Box
This stage is where things can go dangerously wrong if you're not meticulous. Run the wiring from the switch to each junction point. Use heat-resistant cable that complies with local codes and is suitable for use in insulated ceilings.
Wiring Must-Haves:
-
Junction boxes must be accessible, secure, and rated for lighting circuits.
-
Use cable clips to secure runs.
-
Wire strippers will help you prep your ends cleanly—frayed copper is a fire risk.
-
Follow manufacturer diagrams and national standards like BS 7671.
If you're unsure about the electrical load capacity, particularly in older homes, consult an electrician. It’s not just about functionality—fire safety depends on it.
Step 4: Installing the Downlight Unit
Once the cables are run and junctions are cleanly connected, it’s time to insert your pot lights into the ceiling cavity.
Most models, like the 6-inch fire-rated LED pot light, use spring clips for tool-less mounting. Push the clips in and gently insert the light until flush.
Don’t Forget:
-
If your downlight isn’t insulation coverable, install a Loft Lid or compatible intumescent cover.
-
Use fire-rated sealant to close small gaps around the fixture.
-
Confirm that the unit is not tilted or sagging—thermal barrier integrity depends on a tight fit.
Installing in lofts or attics? Consider the risks of air leakage, which can increase heating costs and reduce your home's overall thermal efficiency.
Fire Safety Above the Ceiling: Protecting the Envelope
Now that your pot lights are physically installed, it’s time to turn your attention to what’s happening above the ceiling line. This is where loft insulation, fire protection, and airtightness all come into play. It's also where many DIYers make critical mistakes.
Can Insulation Touch the Pot Light?
This depends entirely on whether your downlights are:
-
IC Rated (Insulation Contact rated)
-
Insulation-coverable, tested for fire safety
-
Specifically listed as safe for loft insulation coverage
Most fire-rated downlights like this 3-inch model are designed for safe contact with insulation, provided they are properly installed with thermal protection mechanisms in place.
Never assume your lights are insulation-safe. Always verify with manufacturer specs. Using non-compliant fixtures can pose severe fire hazards and may invalidate your home insurance.
Fire-Rated Hoods and Loft Lids: Do You Need One?
If you’re using non-fire-rated downlights, or your LED unit specifies no direct insulation contact, you’ll need a fire-retardant cover such as a Loft Lid or an intumescent hood. These act as thermal shields, maintaining a safe air gap and providing fire resistance in case of combustion.
Why They Matter:
-
Prevent overheating in halogen and non-IC-rated LED downlights
-
Ensure compliance with Part B of Building Regulations
-
Minimize risk of air leakage, which can cause heat loss and condensation
-
Improve the fire integrity of your ceiling by sealing holes
Some building inspectors may require evidence of fire-rated hood usage in multi-residential or duplex installations where ceilings form a barrier between units.
Airtightness and Vapour Control
Every hole in your ceiling—especially those made for recessed lighting—compromises its air-tightness. This has two main consequences:
-
Warm air leaks into your loft or attic, causing energy loss
-
Moisture from the living space enters the ceiling void, leading to potential mould or rot
Combat This With:
-
Fire-rated sealant around fixture cut-outs
-
Loft Lid with silicone bead along the base edge
-
Airtight junction boxes and sealed wire entry points
Not only does this improve your thermal efficiency, but it also plays a key role in vapour control, ensuring your insulation stays dry and effective over time.
Testing and Inspection
With everything installed and sealed, your final step before closing up is a thorough inspection and power test.
Your Final Checklist:
-
Power restored safely, using a voltage tester before switch-on
-
All lights operational, with no flickering or delay
-
No visible gaps around downlights
-
Spring clips secure and housing flush with ceiling
-
Junction boxes accessible and labeled
-
Wiring checked for any overheating signs
-
Insulation continuity maintained—no large air gaps or cold bridges
If you used multiple types of lighting zones (e.g. bathrooms and bedrooms), ensure all fixtures meet zone-specific IP ratings and wet/dry environment ratings.
You can now enjoy the energy savings, improved fire safety, and aesthetic impact of your new lighting—knowing your setup is secure, compliant, and efficient.
Common Mistakes to Avoid (And How to Fix Them)
Even experienced installers sometimes get these wrong. Watch for these frequent pitfalls:
1. Wrong Cut-Out Size
Using the incorrect hole saw can lead to sagging fixtures or oversized gaps that compromise fire integrity. Always match the product's cut-out diameter exactly.
2. Using Non-IC Fixtures in Insulated Ceilings
This can cause overheating, insulation charring, or electrical failure. Always confirm the IC rating before installing in an insulated cavity.
3. Ignoring Air Leakage
Gaps around fixtures allow conditioned air to escape. This increases utility bills and allows moisture intrusion—a major issue in colder climates.
4. Skipping Fire Protection Accessories
Leaving out intumescent hoods, fire-rated sealants, or Loft Lids means you're leaving a hole in your ceiling’s fire barrier. Don’t take shortcuts.
“If in doubt, seal it out” is a good rule when it comes to fire and vapour control.
Choosing the Right Fixture for the Job
Different ceiling types and insulation setups call for different fixtures. At LED Network, every product is tested and rated for North American homes, featuring wet ratings, fire resistance, and 5CCT selectability for maximum flexibility.
Here are three great options depending on your room and layout:
-
4-Inch Fire-Rated Pot Light: Ideal for bathrooms, kitchens, and anywhere moisture meets insulation.
-
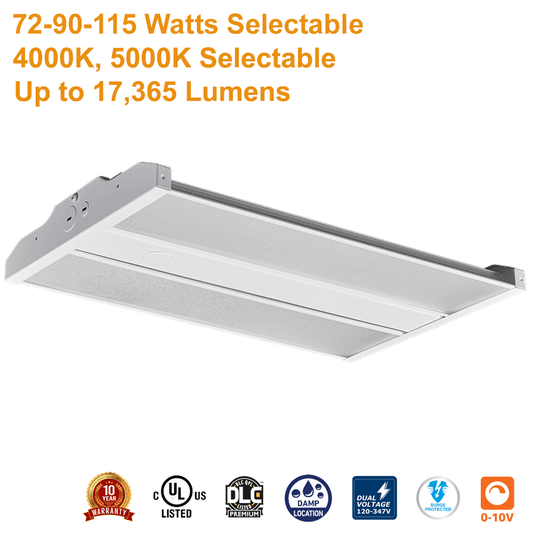
6-Inch High-Lumen Fixture: Great for large open-plan areas or high ceilings.
-
3-Inch Ultra-Compact Pot Light: Perfect for tight spaces and smaller rooms where ceiling space is at a premium.
Retrofitting Recessed Lights into Existing Insulated Ceilings
Upgrading existing lighting with fire-rated pot lights is one of the most impactful (and safest) home improvements you can make—but retrofitting requires an added layer of care.
Challenges in Retrofitting:
-
Legacy wiring may lack proper insulation rating
-
Ceilings often lack airtightness around old fixtures
-
Some older downlights are not fire-rated, or worse, fitted with dichroic bulbs
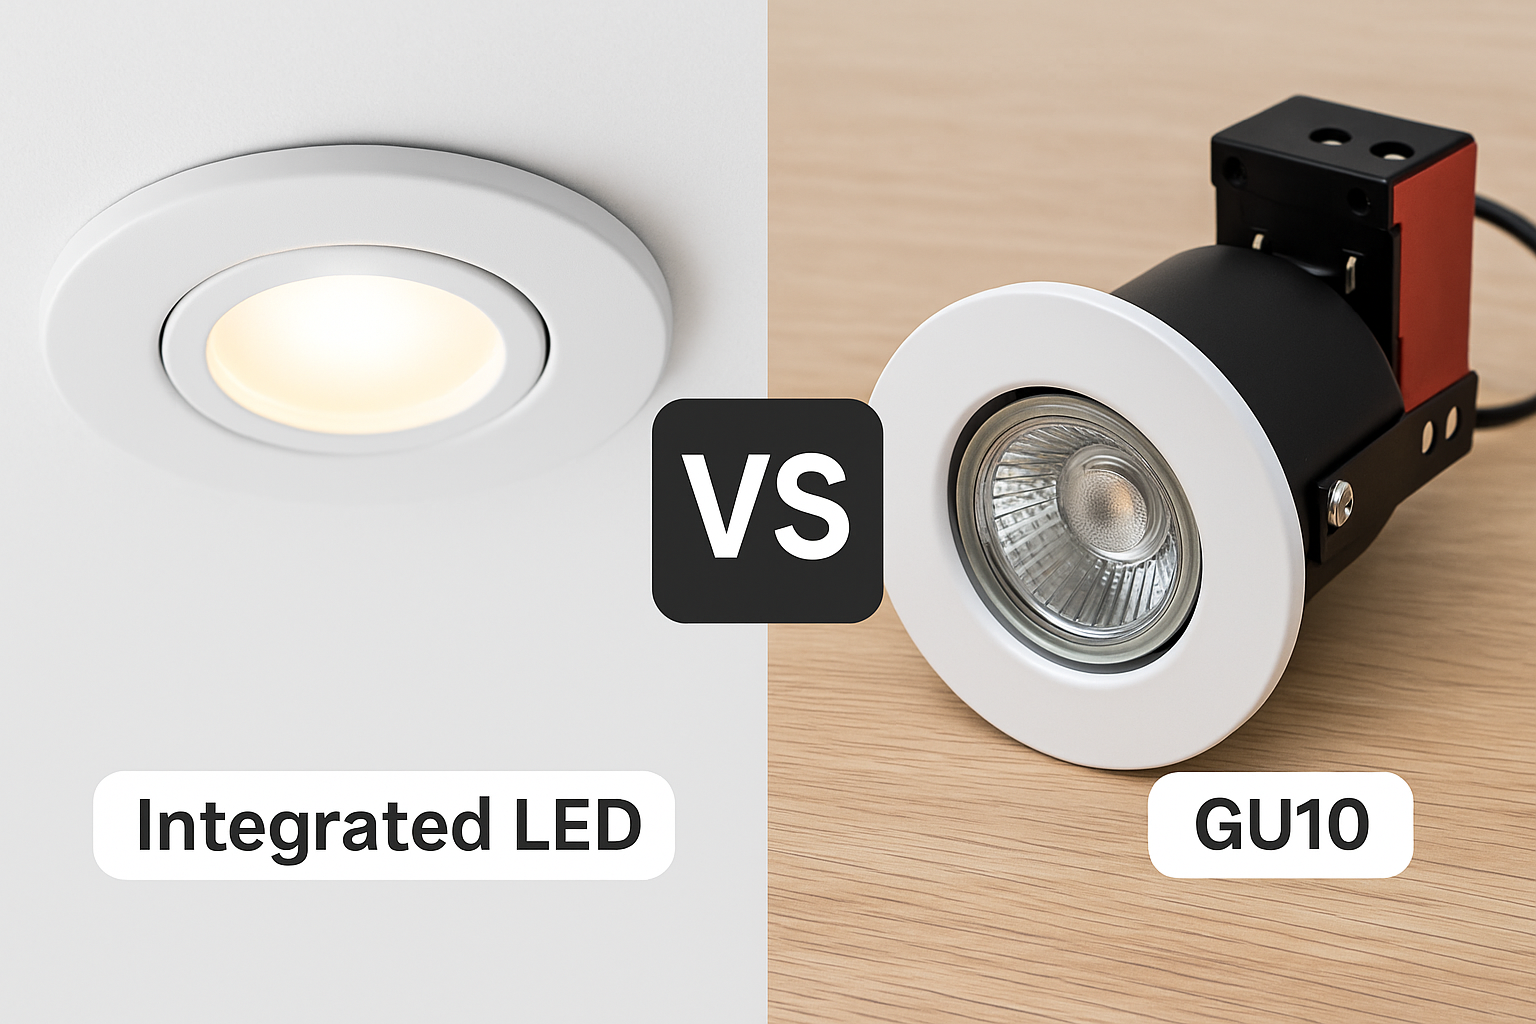
If your existing lights are halogen downlights, consider replacing them with integrated LED downlights for reduced heat output, better efficiency, and a significant reduction in fire risk.
Steps for Safe Retrofitting:
-
Turn off power at the breaker and test with a voltage tester.
-
Remove old fixtures, ensuring you don’t damage the ceiling plasterboard.
-
Inspect wiring: Replace if degraded or not up to BS 7671 or Canadian Electrical Code.
-
Seal old openings properly before cutting new ones with the correct hole saw size.
-
Install IC-rated, fire-rated pot lights, and verify they’re compatible with loft insulation.
-
Apply fire-rated sealant and, if needed, use a Loft Lid or fire hood to maintain fire barrier continuity.
For high-quality retrofit options, LED Network’s fire-rated lighting collection offers several sizes and lumen outputs compatible with most retrofit applications.
Energy Savings and Thermal Efficiency
When pot lights are improperly installed, they become thermal liabilities—leaking heat, raising bills, and undermining your home's overall efficiency.
Here’s how fire-rated recessed lighting, installed correctly, contributes to energy efficiency:
Benefits at a Glance:
-
Air leakage control: Proper sealing reduces heat escape.
-
Airtight housing: Prevents warm air loss through ceiling cut-outs.
-
IC-rated fixtures: Designed for contact with insulation, maintaining thermal continuity.
-
LED technology: Consumes up to 80% less energy than halogens.
-
5CCT selectable lights: Help match illumination needs without over-lighting.
According to ENERGY STAR®, replacing traditional downlights with IC-rated LED fixtures in insulated ceilings can save up to $100 annually per 10 lights, depending on usage and climate.
Frequently Asked Questions
Q: Are fire-rated pot lights mandatory in all ceilings?
A: No, but they are required in ceilings that form a fire separation between floors or in multi-unit dwellings. Check your local Building Regulations or speak with your building inspector for clarity.
Q: Can I cover my pot lights with insulation?
A: Only if the light is IC-rated and clearly labeled as insulation-coverable. If not, install a Loft Lid or fire-rated hood to maintain safety and performance.
Q: What’s the difference between IC-rated and fire-rated?
A:
-
IC-rated = Safe for contact with insulation
-
Fire-rated = Maintains the ceiling’s fire resistance (30/60/90/120 min)
Some products are both, and these are ideal for insulated ceilings.
Q: Do I need to hire an electrician?
A: If you're unfamiliar with electrical certification, load balancing, or lighting ventilation, hiring a licensed professional is strongly recommended. DIY is fine—only if you're confident and compliant.
Final Thoughts
Installing fire-rated pot lights in insulated ceilings is a step that combines safety, energy efficiency, and aesthetic appeal—but it demands precision. From cutting accurate ceiling holes to ensuring fire integrity and thermal bridging control, each part of the process must be intentional and up to code.
By using IC-rated, fire-rated fixtures, and understanding the science behind insulation-safe lighting, you’re not just upgrading a room—you’re reinforcing your entire home’s envelope.
If you're looking for tested, certified, and modern lighting options, LED Network offers a curated selection of fire-rated pot lights engineered for Canadian homes. Whether you’re lighting a bathroom, retrofitting an attic, or finishing a basement ceiling, there’s a solution designed for airtightness, energy savings, and fire safety.
Ready to Upgrade Your Ceiling?
Explore top-rated fire-rated recessed lights:
Take your ceiling seriously—choose fire-rated.
Frequently Asked Questions (FAQ)
1. What does “fire-rated” actually mean for pot lights?
A fire-rated pot light is designed to help maintain the integrity of a fire-rated ceiling for a set duration (typically 30, 60, 90, or 120 minutes). These fixtures have built-in intumescent materials that expand in high temperatures to seal gaps, preventing fire and smoke from spreading through cut-outs made in the ceiling.
2. Are all IC-rated lights also fire-rated?
No. IC-rated means the fixture is safe for direct contact with insulation, while fire-rated refers to its ability to preserve the fire-resistance rating of the ceiling structure. Some fixtures are both IC-rated and fire-rated, but you must check product specifications to confirm.
3. Can I install fire-rated downlights in concrete ceilings?
Yes, but the process is different. You may need special tools for drilling and anchor fittings designed for masonry. Also, ensure that the fire-rated fixture is suitable for non-combustible substrates. Many products specify if they’re approved for timber, drywall, or concrete use.
4. Do fire-rated pot lights require a transformer?
Most modern LED fire-rated pot lights are line-voltage (120V) and do not require external transformers. However, older or specialized models may still use low-voltage systems and need a compatible driver or transformer. Always confirm compatibility with your electrical system.
5. How do I know what fire rating I need (30, 60, or 90 minutes)?
The required fire resistance rating depends on the building type, ceiling construction, and local code. For example:
-
30 min: Single-family homes between floors
-
60+ min: Flats, commercial properties, or ceilings beneath escape routes
Consult your local building authority for compliance.
6. Can I install fire-rated downlights in suspended ceilings?
Yes, but the ceiling tiles and suspension system must also be fire-rated. The fixture itself must be compatible with this setup and mounted using an approved bracket or frame kit. The entire system must be tested to maintain its fire rating.
7. Are there fire-rated pot lights suitable for smart lighting systems?
Yes. Some fire-rated downlights are compatible with smart dimmers, motion sensors, or home automation systems such as Zigbee or Wi-Fi-enabled switches. Make sure your chosen fixture supports dimming and remote control functions without voiding its fire certification.
8. What type of insulation is best around fire-rated pot lights?
Most fibreglass, mineral wool, or blown-in cellulose insulations are acceptable, provided the fixture is IC-rated. Avoid using spray foam directly around fixtures unless explicitly approved—it can trap heat and void the light’s rating.
9. Do I need to use a vapour barrier with fire-rated pot lights?
If you're installing in a ceiling that requires vapour control (e.g., under cold roof spaces), yes. Use vapour-sealed housings or apply an airtight cover like a Loft Lid in conjunction with fire-rated sealant to preserve the barrier while maintaining fire safety.
10. How many fire-rated pot lights can I run on a single circuit?
This depends on the wattage of the pot lights and the amperage of the circuit. For example, with 12W LED pot lights on a 15A circuit (120V), you could theoretically power up to 1500 ÷ 12 = 125 lights, but practical and code limits, voltage drop, and load balancing should be calculated by a qualified electrician.